Create a New Agent
With FormAgent.ai, you can easily create an AI agent in just a few steps.
Agent Creation Screen
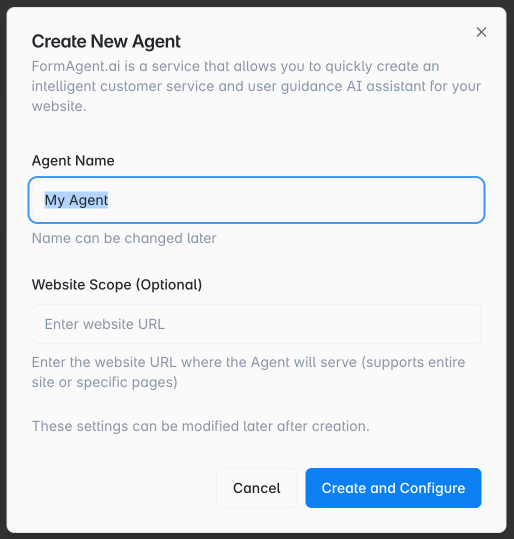
Steps to Create an Agent
1. Enter the Agent Name
- Give your agent a clear, recognizable name.
- For example: "My Agent", "Support AI", etc.
- The name can be changed at any time.
2. Enter Website Scope (Optional)
- Enter the URL of the website where you want the agent to appear.
- You can specify the entire site or a specific page.
- This setting can be adjusted later.
3. Create and Configure
- Click the "Create and Configure" button to automatically create your agent.
- After creation, you'll be taken to the agent's detailed settings page.
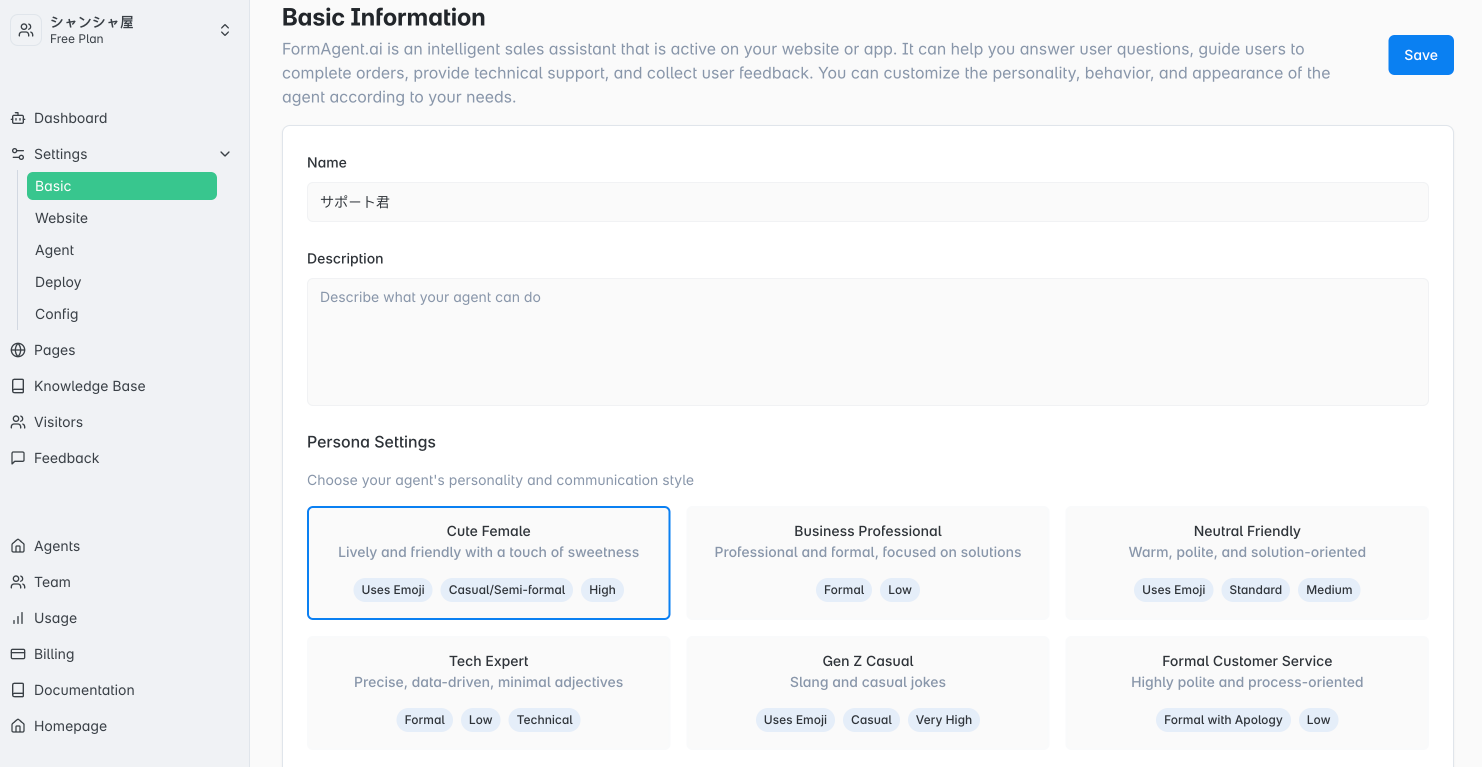
Next Step: Detailed Agent Settings
After creating your agent, you can further configure the following:
- Agent Name: The name shown to users
- Agent Description: Explain its role and purpose
- Capabilities & Features: What questions it can answer, what support it provides
- Personality & Tone: Friendly, formal, lively, etc.—defines the AI's conversation style
- Supported Languages: Such as English, Chinese, etc.
These settings let you fully customize your agent's personality and user experience.
More details will be added soon.
- For any other questions or issues, feel free to contact us via the FormAgent.ai homepage using the agent chat.
- Email: [email protected]